Android 天气APP(五)天气预报、生活指数的数据请求与渲染
通过卫星、雷达和气象站收集的数据,天气预报员可以预测未来的天气情况。 #生活常识# #天气预报#
public String getLon() {
return lon;
}
public void setLon(String lon) {
this.lon = lon;
}
public String getTz() {
return tz;
}
public void setTz(String tz) {
this.tz = tz;
}
}
public static class UpdateBean {
/**
loc : 2019-11-19 19:57
utc : 2019-11-19 11:57
*/
private String loc;
private String utc;
public String getLoc() {
return loc;
}
public void setLoc(String loc) {
this.loc = loc;
}
public String getUtc() {
return utc;
}
public void setUtc(String utc) {
this.utc = utc;
}
}
public static class DailyForecastBean {
/**
cond_code_d : 100
cond_code_n : 101
cond_txt_d : 晴
cond_txt_n : 多云
date : 2019-11-19
hum : 50
mr : 23:52
ms : 12:27
pcpn : 0.0
pop : 20
pres : 1012
sr : 06:39
ss : 17:38
tmp_max : 22
tmp_min : 16
uv_index : 5
vis : 25
wind_deg : 31
wind_dir : 东北风
wind_sc : 3-4
wind_spd : 17
*/
private String cond_code_d;
private String cond_code_n;
private String cond_txt_d;
private String cond_txt_n;
private String date;
private String hum;
private String mr;
private String ms;
private String pcpn;
private String pop;
private String pres;
private String sr;
private String ss;
private String tmp_max;
private String tmp_min;
private String uv_index;
private String vis;
private String wind_deg;
private String wind_dir;
private String wind_sc;
private String wind_spd;
public String getCond_code_d() {
return cond_code_d;
}
public void setCond_code_d(String cond_code_d) {
this.cond_code_d = cond_code_d;
}
public String getCond_code_n() {
return cond_code_n;
}
public void setCond_code_n(String cond_code_n) {
this.cond_code_n = cond_code_n;
}
public String getCond_txt_d() {
return cond_txt_d;
}
public void setCond_txt_d(String cond_txt_d) {
this.cond_txt_d = cond_txt_d;
}
public String getCond_txt_n() {
return cond_txt_n;
}
public void setCond_txt_n(String cond_txt_n) {
this.cond_txt_n = cond_txt_n;
}
public String getDate() {
return date;
}
public void setDate(String date) {
this.date = date;
}
public String getHum() {
return hum;
}
public void setHum(String hum) {
this.hum = hum;
}
public String getMr() {
return mr;
}
public void setMr(String mr) {
this.mr = mr;
}
public String getMs() {
return ms;
}
public void setMs(String ms) {
this.ms = ms;
}
public String getPcpn() {
return pcpn;
}
public void setPcpn(String pcpn) {
this.pcpn = pcpn;
}
public String getPop() {
return pop;
}
public void setPop(String pop) {
this.pop = pop;
}
public String getPres() {
return pres;
}
public void setPres(String pres) {
this.pres = pres;
}
public String getSr() {
return sr;
}
public void setSr(String sr) {
this.sr = sr;
}
public String getSs() {
return ss;
}
public void setSs(String ss) {
this.ss = ss;
}
public String getTmp_max() {
return tmp_max;
}
public void setTmp_max(String tmp_max) {
this.tmp_max = tmp_max;
}
public String getTmp_min() {
return tmp_min;
}
public void setTmp_min(String tmp_min) {
this.tmp_min = tmp_min;
}
public String getUv_index() {
return uv_index;
}
public void setUv_index(String uv_index) {
this.uv_index = uv_index;
}
public String getVis() {
return vis;
}
public void setVis(String vis) {
this.vis = vis;
}
public String getWind_deg() {
return wind_deg;
}
public void setWind_deg(String wind_deg) {
this.wind_deg = wind_deg;
}
public String getWind_dir() {
return wind_dir;
}
public void setWind_dir(String wind_dir) {
this.wind_dir = wind_dir;
}
public String getWind_sc() {
return wind_sc;
}
public void setWind_sc(String wind_sc) {
this.wind_sc = wind_sc;
}
public String getWind_spd() {
return wind_spd;
}
public void setWind_spd(String wind_spd) {
this.wind_spd = wind_spd;
}
}
}
}
接下来在ApiService中添加

代码如下:
/**
未来3 - 7天天气预报*/
@GET(“/s6/weather/forecast?key=3086e91d66c04ce588a7f538f917c7f4”)
Call getWeatherForecast(@Query(“location”) String location);
② 修改订阅器接下来修改订阅器WeatherContract


WeatherContract代码如下:
package com.llw.goodweather.contract;
import android.content.Context;
import com.llw.goodweather.api.ApiService;
import com.llw.goodweather.bean.TodayResponse;
import com.llw.goodweather.bean.WeatherForecastResponse;
import com.llw.mvplibrary.base.BasePresenter;
import com.llw.mvplibrary.base.BaseView;
import com.llw.mvplibrary.net.NetCallBack;
import com.llw.mvplibrary.net.ServiceGenerator;
import retrofit2.Call;
import retrofit2.Response;
/**
天气订阅器*/
public class WeatherContract {
public static class WeatherPresenter extends BasePresenter {
/**
当日天气
@param context
@param location 区/县
*/
public void todayWeather(final Context context, String location) {
//得到构建之后的网络请求服务,这里的地址已经拼接完成,只差一个location了
ApiService service = ServiceGenerator.createService(ApiService.class);
//设置请求回调 NetCallBack是重写请求回调
service.getTodayWeather(location).enqueue(new NetCallBack() {
//成功回调
@Override
public void onSuccess(Call call, Response response) {
if (getView() != null) {//当视图不会空时返回请求数据
getView().getTodayWeatherResult(response);
}
}
//失败回调
@Override
public void onFailed() {
if (getView() != null) {//当视图不会空时获取错误信息
getView().getDataFailed();
}
}
});
}
/**
天气预报 3-7天(白嫖的就只能看到3天)
@param context
@param location
*/
public void weatherForecast(final Context context,String location){
ApiService service = ServiceGenerator.createService(ApiService.class);
service.getWeatherForecast(location).enqueue(new NetCallBack() {
@Override
public void onSuccess(Call call, Response response) {
if(getView() != null){
getView().getWeatherForecastResult(response);
}
}
@Override
public void onFailed() {
if(getView() != null){
getView().getDataFailed();
}
}
});
}
}
public interface IWeatherView extends BaseView {
//查询当天天气的数据返回
void getTodayWeatherResult(Response response);
//查询天气预报的数据返回
void getWeatherForecastResult(Response response);
//错误返回
void getDataFailed();
}
}
接下来修改布局,增加列表和适配器
③ 修改布局,增加列表和适配器
代码中

这个时候你的MainActivity.java会报错

这是因为订阅器里面的内容没有写入。鼠标点击,Alt + Enter


接下来创建列表的item
在layout目录下创建item_weather_forecast_list.xml文件

代码如下:
<?xml version="1.0" encoding="utf-8"?>
<LinearLayout xmlns:android=“http://schemas.android.com/apk/res/android”
android:orientation=“vertical”
android:layout_width=“match_parent”
android:layout_height=“wrap_content”>
<LinearLayout
android:padding=“@dimen/sp_12”
android:orientation=“horizontal”
android:layout_width=“match_parent”
android:layout_height=“wrap_content”>
<TextView
android:id=“@+id/tv_date”
android:text=“1234”
android:textSize=“@dimen/sp_14”
android:textColor=“#FFF”
android:layout_width=“0dp”
android:layout_weight=“1”
android:layout_height=“wrap_content”/>
<TextView
android:gravity=“center”
android:id=“@+id/tv_info”
android:textSize=“@dimen/sp_14”
android:textColor=“#FFF”
android:layout_width=“0dp”
android:layout_weight=“1”
android:layout_height=“wrap_content”/>
<TextView
android:gravity=“right”
android:id=“@+id/tv_low_and_height”
android:textSize=“@dimen/sp_14”
android:textColor=“#FFF”
android:layout_width=“0dp”
android:layout_weight=“1”
android:layout_height=“wrap_content”/>
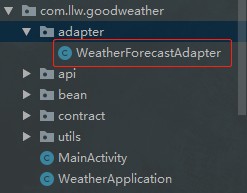
接下来创建一个适配器
在com.llw.goodweather下新建一个WeatherForecastAdapter适配器
代码如下:
package com.llw.goodweather.adapter;
import androidx.annotation.Nullable;
import com.chad.library.adapter.base.BaseQuickAdapter;
import com.chad.library.adapter.base.BaseViewHolder;
import com.llw.goodweather.R;
import com.llw.goodweather.bean.WeatherForecastResponse;
import java.util.List;
/**
天气预报列表展示适配器*/
public class WeatherForecastAdapter extends BaseQuickAdapter<WeatherForecastResponse.HeWeather6Bean.DailyForecastBean, BaseViewHolder> {
public WeatherForecastAdapter(int layoutResId, @Nullable List<WeatherForecastResponse.HeWeather6Bean.DailyForecastBean> data) {
super(layoutResId, data);
}
@Override
protected void convert(BaseViewHolder helper, WeatherForecastResponse.HeWeather6Bean.DailyForecastBean item) {
helper.setText(R.id.tv_date, item.getDate())//日期
.setText(R.id.tv_info, item.getCond_txt_d())//天气
.setText(R.id.tv_low_and_height, item.getTmp_min() + “/” + item.getTmp_max() + “℃”);//最低温和最高温
}
}
④ 使用适配器进行数据展示在MainActivity.java中增加
List<WeatherForecastResponse.HeWeather6Bean.DailyForecastBean> mList;//初始化数据源
WeatherForecastAdapter mAdapter;//初始化适配器
/**
初始化天气预报数据列表*/
private void initList() {
mList = new ArrayList<>();//声明为ArrayList
mAdapter = new WeatherForecastAdapter(R.layout.item_weather_forecast_list, mList);//为适配器设置布局和数据源
LinearLayoutManager manager = new LinearLayoutManager(context);//布局管理,默认是纵向
rv.setLayoutManager(manager);//为列表配置管理器
rv.setAdapter(mAdapter);//为列表配置适配器
}
然后在**initData()**方法中调用


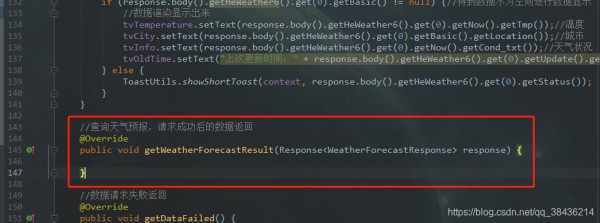
返回值做处理
//查询天气预报,请求成功后的数据返回
@Override
public void getWeatherForecastResult(Response response) {
if ((“ok”).equals(response.body().getHeWeather6().get(0).getStatus())) {
//最低温和最高温
tvLowHeight.setText(response.body().getHeWeather6().get(0).getDaily_forecast().get(0).getTmp_min() + " / " +
response.body().getHeWeather6().get(0).getDaily_forecast().get(0).getTmp_max() + “℃”);
if (response.body().getHeWeather6().get(0).getDaily_forecast() != null) {
List<WeatherForecastResponse.HeWeather6Bean.DailyForecastBean> data
= response.body().getHeWeather6().get(0).getDaily_forecast();
mList.clear();//添加数据之前先清除
mList.addAll(data);//添加数据
mAdapter.notifyDataSetChanged();//刷新列表
} else {
ToastUtils.showShortToast(context, “天气预报数据为空”);
}
} else {
ToastUtils.showShortToast(context, response.body().getHeWeather6().get(0).getStatus());
}
}
运行

这样天气预报这个功能就完成了。
接下来是生活指数。
7. 生活指数
生活指数就是一些生活建议,实现的不走其实和天气预报差不太多,但是比天气预报要简单一些,因为不需要列表显示,文本即可。
① 新增API接口根据和风天气中的文档,得知生活指数接口为:
https://free-api.heweather.net/s6/weather/lifestyle?key=3086e91d66c04ce588a7f538f917c7f4&location=福田区
在网页上访问得到返回值,生成一个实体

代码如下:
package com.llw.goodweather.bean;
import java.util.List;
public class LifeStyleResponse {
private List HeWeather6;
public List getHeWeather6() {
return HeWeather6;
}
public void setHeWeather6(List HeWeather6) {
this.HeWeather6 = HeWeather6;
}
public static class HeWeather6Bean {
/**
basic : {“cid”:“CN101280603”,“location”:“福田”,“parent_city”:“深圳”,“admin_area”:“广东”,“cnty”:“中国”,“lat”:“22.5410099”,“lon”:“114.05095673”,“tz”:“+8.00”}
update : {“loc”:“2019-11-23 09:55”,“utc”:“2019-11-23 01:55”}
status : ok
lifestyle : [{“type”:“comf”,“brf”:“舒适”,“txt”:“白天不太热也不太冷,风力不大,相信您在这样的天气条件下,应会感到比较清爽和舒适。”},{“type”:“drsg”,“brf”:“热”,“txt”:“天气热,建议着短裙、短裤、短薄外套、T恤等夏季服装。”},{“type”:“flu”,“brf”:“少发”,“txt”:“各项气象条件适宜,无明显降温过程,发生感冒机率较低。”},{“type”:“sport”,“brf”:“适宜”,“txt”:“天气较好,赶快投身大自然参与户外运动,尽情感受运动的快乐吧。”},{“type”:“trav”,“brf”:“适宜”,“txt”:“天气较好,温度适宜,是个好天气哦。这样的天气适宜旅游,您可以尽情地享受大自然的风光。”},{“type”:“uv”,“brf”:“强”,“txt”:“紫外线辐射强,建议涂擦SPF20左右、PA++的防晒护肤品。避免在10点至14点暴露于日光下。”},{“type”:“cw”,“brf”:“适宜”,“txt”:“适宜洗车,未来持续两天无雨天气较好,适合擦洗汽车,蓝天白云、风和日丽将伴您的车子连日洁净。”},{“type”:“air”,“brf”:“中”,“txt”:“气象条件对空气污染物稀释、扩散和清除无明显影响。”}]
*/
private BasicBean basic;
private UpdateBean update;
private String status;
private List lifestyle;
public BasicBean getBasic() {
return basic;
}
public void setBasic(BasicBean basic) {
this.basic = basic;
}
public UpdateBean getUpdate() {
return update;
}
public void setUpdate(UpdateBean update) {
this.update = update;
}
public String getStatus() {
return status;
}
public void setStatus(String status) {
this.status = status;
}
public List getLifestyle() {
return lifestyle;
}
public void setLifestyle(List lifestyle) {
this.lifestyle = lifestyle;
}
public static class BasicBean {
/**
cid : CN101280603
location : 福田
parent_city : 深圳
admin_area : 广东
cnty : 中国
lat : 22.5410099
lon : 114.05095673
tz : +8.00
*/
private String cid;
private String location;
private String parent_city;
private String admin_area;
private String cnty;
private String lat;
private String lon;
private String tz;
public String getCid() {
return cid;
}
public void setCid(String cid) {
this.cid = cid;
}
public String getLocation() {
return location;
}
public void setLocation(String location) {
this.location = location;
}
public String getParent_city() {
return parent_city;
}
public void setParent_city(String parent_city) {
this.parent_city = parent_city;
}
public String getAdmin_area() {
return admin_area;
}
public void setAdmin_area(String admin_area) {
this.admin_area = admin_area;
}
public String getCnty() {
return cnty;
}
public void setCnty(String cnty) {
this.cnty = cnty;
}
public String getLat() {
return lat;
}
public void setLat(String lat) {
this.lat = lat;
}
public String getLon() {
return lon;
}
public void setLon(String lon) {
this.lon = lon;
}
public String getTz() {
return tz;
}
public void setTz(String tz) {
this.tz = tz;
}
}
public static class UpdateBean {
/**
loc : 2019-11-23 09:55
utc : 2019-11-23 01:55
*/
private String loc;
private String utc;
public String getLoc() {
return loc;
}
public void setLoc(String loc) {
this.loc = loc;
}
public String getUtc() {
return utc;
}
public void setUtc(String utc) {
this.utc = utc;
}
}
public static class LifestyleBean {
/**
type : comf
brf : 舒适
txt : 白天不太热也不太冷,风力不大,相信您在这样的天气条件下,应会感到比较清爽和舒适。
*/
private String type;
private String brf;
private String txt;
public String getType() {
return type;
}
public void setType(String type) {
this.type = type;
}
public String getBrf() {
return brf;
}
public void setBrf(String brf) {
this.brf = brf;
}
public String getTxt() {
return txt;
}
public void setTxt(String txt) {
this.txt = txt;
}
}
}
}
在ApiService中增加

代码如下:
/**
生活指数*/
@GET(“/s6/weather/lifestyle?key=3086e91d66c04ce588a7f538f917c7f4”)
Call getLifestyle(@Query(“location”) String location);
记得将key的值修改为自己的Key
② 修改订阅器在WeatherContract新增生活指数订阅


/**
生活指数
@param context
@param location
*/
public void lifeStyle(final Context context,String location){
ApiService service = ServiceGenerator.createService(ApiService.class);
service.getLifestyle(location).enqueue(new NetCallBack() {
@Override
public void onSuccess(Call call, Response response) {
if(getView() != null){
getView().getLifeStyleResult(response);
}
}
@Override
public void onFailed() {
if(getView() != null){
getView().getDataFailed();
}
}
});
}
//查询生活指数的数据返回
void getLifeStyleResult(Response response);
③ 修改布局这次要展示的数据会比较多,所以布局的整体要用NestedScrollView包裹起来,变成一个·可以上下滑动的布局,布局修改后的代码如下(PS:为了不出现问题,这里我贴上全部的布局代码):
<?xml version="1.0" encoding="utf-8"?>
<LinearLayout xmlns:android=“http://schemas.android.com/apk/res/android”
xmlns:app=“http://schemas.android.com/apk/res-auto”
xmlns:tools=“http://schemas.android.com/tools”
android:gravity=“center”
android:fitsSystemWindows=“true”
android:background=“@drawable/pic_bg”
android:layout_width=“match_parent”
android:layout_height=“match_parent”
tools:context=“.MainActivity”>
<RelativeLayout
android:layout_width=“match_parent”
android:layout_height=“match_parent”>
<LinearLayout
android:background=“#000”
android:alpha=“0.3”
android:layout_width=“match_parent”
android:layout_height=“match_parent”/>
<LinearLayout
android:orientation=“vertical”
android:layout_width=“match_parent”
android:layout_height=“match_parent”>
<androidx.appcompat.widget.Toolbar
android:id=“@+id/toolbar”
android:layout_width=“match_parent”
android:layout_height=“?attr/actionBarSize”
app:contentInsetLeft=“16dp”
app:popupTheme=“@style/AppTheme.PopupOverlay”>
<TextView
android:layout_width=“wrap_content”
android:layout_height=“wrap_content”
android:layout_gravity=“center”
android:textSize=“16sp”
android:textColor=“#FFF”
android:text=“城市天气” />
</androidx.appcompat.widget.Toolbar>
<androidx.core.widget.NestedScrollView
android:overScrollMode=“never”
android:layout_width=“match_parent”
android:layout_height=“match_parent”>
<LinearLayout
android:gravity=“center_horizontal”
android:orientation=“vertical”
android:layout_width=“match_parent”
android:layout_height=“match_parent”>
<TextView
android:paddingLeft=“16dp”
android:paddingTop=“12dp”
android:id=“@+id/tv_info”
android:textColor=“#FFF”
android:textSize=“18sp”
android:layout_width=“match_parent”
android:layout_height=“wrap_content”/>
<LinearLayout
android:gravity=“top|center_horizontal”
android:layout_marginTop=“20dp”
android:orientation=“horizontal”
android:layout_width=“match_parent”
android:layout_height=“wrap_content”>
<TextView
android:id=“@+id/tv_temperature”
android:layout_width=“wrap_content”
android:layout_height=“wrap_content”
android:text=“0”
android:textColor=“#FFF”
android:textSize=“60sp” />
<TextView
android:layout_width=“wrap_content”
android:layout_height=“match_parent”
android:text=“℃”
android:textColor=“#FFF”
android:textSize=“24sp” />
<TextView
android:layout_marginTop=“12dp”
android:id=“@+id/tv_low_height”
android:textColor=“#FFF”
android:textSize=“@dimen/sp_14”
android:layout_width=“wrap_content”
android:layout_height=“wrap_content”/>
<TextView
android:layout_marginTop=“20dp”
android:id=“@+id/tv_city”
android:textColor=“#FFF”
android:text=“城市”
android:textSize=“20sp”
android:layout_width=“wrap_content”
android:layout_height=“wrap_content”/>
<TextView
android:layout_marginTop=“8dp”
android:id=“@+id/tv_old_time”
android:textColor=“#FFF”
android:text=“上次更新时间:”
android:textSize=“@dimen/sp_12”
android:layout_width=“wrap_content”
android:layout_height=“wrap_content”/>
<androidx.recyclerview.widget.RecyclerView
android:layout_marginTop=“20dp”
android:id=“@+id/rv”
android:layout_width=“match_parent”
android:layout_height=“wrap_content”/>
<LinearLayout
android:orientation=“vertical”
android:padding=“20dp”
android:layout_width=“match_parent”
android:layout_height=“wrap_content”>
<TextView
android:textSize=“18sp”
android:textColor=“#FFF”
android:text=“生活建议”
android:layout_width=“wrap_content”
android:layout_height=“wrap_content”/>
<TextView
android:layout_marginTop=“16dp”
android:id=“@+id/tv_comf”
android:text=“舒适度:”
android:textSize=“@dimen/sp_14”
android:textColor=“#FFF”
android:layout_width=“wrap_content”
android:layout_height=“wrap_content”/>
<TextView
android:layout_marginTop=“16dp”
android:id=“@+id/tv_trav”
android:text=“旅游指数:”
android:textSize=“@dimen/sp_14”
android:textColor=“#FFF”
android:layout_width=“wrap_content”
android:layout_height=“wrap_content”/>
<TextView
android:layout_marginTop=“16dp”
android:id=“@+id/tv_sport”
android:text=“运动指数:”
android:textSize=“@dimen/sp_14”
android:textColor=“#FFF”
android:layout_width=“wrap_content”
android:layout_height=“wrap_content”/>
<TextView
android:layout_marginTop=“16dp”
android:id=“@+id/tv_cw”
android:text=“洗车指数:”
android:textSize=“@dimen/sp_14”
android:textColor=“#FFF”
android:layout_width=“wrap_content”
android:layout_height=“wrap_content”/>
<TextView
android:layout_marginTop=“16dp”
android:id=“@+id/tv_air”
android:text=“空气指数:”
android:textSize=“@dimen/sp_14”
android:textColor=“#FFF”
android:layout_width=“wrap_content”
android:layout_height=“wrap_content”/>
总结
Android架构学习进阶是一条漫长而艰苦的道路,不能靠一时激情,更不是熬几天几夜就能学好的,必须养成平时努力学习的习惯。所以:贵在坚持!
上面分享的字节跳动公司2021年的面试真题解析大全,笔者还把一线互联网企业主流面试技术要点整理成了视频和PDF(实际上比预期多花了不少精力),包含知识脉络 + 诸多细节。

【Android高级架构视频学习资源】
Android部分精讲视频领取学习后更加是如虎添翼!进军BATJ大厂等(备战)!现在都说互联网寒冬,其实无非就是你上错了车,且穿的少(技能),要是你上对车,自身技术能力够强,公司换掉的代价大,怎么可能会被裁掉,都是淘汰末端的业务Curd而已!现如今市场上初级程序员泛滥,这套教程针对Android开发工程师1-6年的人员、正处于瓶颈期,想要年后突破自己涨薪的,进阶Android中高级、架构师对你更是如鱼得水,赶快领取吧!
《Android学习笔记总结+移动架构视频+大厂面试真题+项目实战源码》,点击传送门,即可获取!
ze=“18sp”
android:textColor=“#FFF”
android:text=“生活建议”
android:layout_width=“wrap_content”
android:layout_height=“wrap_content”/>
<TextView
android:layout_marginTop=“16dp”
android:id=“@+id/tv_comf”
android:text=“舒适度:”
android:textSize=“@dimen/sp_14”
android:textColor=“#FFF”
android:layout_width=“wrap_content”
android:layout_height=“wrap_content”/>
<TextView
android:layout_marginTop=“16dp”
android:id=“@+id/tv_trav”
android:text=“旅游指数:”
android:textSize=“@dimen/sp_14”
android:textColor=“#FFF”
android:layout_width=“wrap_content”
android:layout_height=“wrap_content”/>
<TextView
android:layout_marginTop=“16dp”
android:id=“@+id/tv_sport”
android:text=“运动指数:”
android:textSize=“@dimen/sp_14”
android:textColor=“#FFF”
android:layout_width=“wrap_content”
android:layout_height=“wrap_content”/>
<TextView
android:layout_marginTop=“16dp”
android:id=“@+id/tv_cw”
android:text=“洗车指数:”
android:textSize=“@dimen/sp_14”
android:textColor=“#FFF”
android:layout_width=“wrap_content”
android:layout_height=“wrap_content”/>
<TextView
android:layout_marginTop=“16dp”
android:id=“@+id/tv_air”
android:text=“空气指数:”
android:textSize=“@dimen/sp_14”
android:textColor=“#FFF”
android:layout_width=“wrap_content”
android:layout_height=“wrap_content”/>
总结
Android架构学习进阶是一条漫长而艰苦的道路,不能靠一时激情,更不是熬几天几夜就能学好的,必须养成平时努力学习的习惯。所以:贵在坚持!
上面分享的字节跳动公司2021年的面试真题解析大全,笔者还把一线互联网企业主流面试技术要点整理成了视频和PDF(实际上比预期多花了不少精力),包含知识脉络 + 诸多细节。
[外链图片转存中…(img-Bn58D6aI-1714412335193)]
【Android高级架构视频学习资源】
Android部分精讲视频领取学习后更加是如虎添翼!进军BATJ大厂等(备战)!现在都说互联网寒冬,其实无非就是你上错了车,且穿的少(技能),要是你上对车,自身技术能力够强,公司换掉的代价大,怎么可能会被裁掉,都是淘汰末端的业务Curd而已!现如今市场上初级程序员泛滥,这套教程针对Android开发工程师1-6年的人员、正处于瓶颈期,想要年后突破自己涨薪的,进阶Android中高级、架构师对你更是如鱼得水,赶快领取吧!
《Android学习笔记总结+移动架构视频+大厂面试真题+项目实战源码》,点击传送门,即可获取!
网址:Android 天气APP(五)天气预报、生活指数的数据请求与渲染 https://www.yuejiaxmz.com/news/view/223101
相关内容
小米天气预报appAndroid(安卓)APP——生活助手(专注于天气)
天气有关的生活指数
记录数据 生活管家APP
python基于天气预测的生活规划系统的设计与实现
城区天气预报一周,7天,10天,15天,未来一周天气预报查询
40天天气预报
天气预报15天
查看福建天气预报软件有哪些
【天全天气预报15天
随便看看
最新动态分享
- 现代厨房设计:木质收纳与金属厨具的完美融合设计灵感图片素材
- 最环保的装修知识大总结,你一定要知道哦!
- 香港雪宝板材推荐|环保装修首选!10年装修师全攻略
- ✨必看!OBoto进口木材全:环保家居装修的黄金选择✨
- 南林大木材科研中心|国家级实验室如何打造绿色建材新标杆!环保建材家居装修干货可持续生活
- 书籍让生活更美好作文(通用7篇)
- 實用的改變生活的作文8篇
- 实用的改变生活的作文6篇
- 《包邮正版 原生家庭的羁绊用心理学改写人生脚本+美好生活方法论 改善亲密家庭和人际关系的21堂萨提亚课 全2册 原生家庭心理学书籍》 【简介
- 电视剧《平凡的世界》开播 再掀经典小说改编热潮
热点动态分享
- 132340
- 36074
- 35274
- 23562
- 22938
- 21228
- 20370
- 14733
- 14646
- 14639