python 发送QQ邮箱
在QQ邮箱中,星标邮件可以帮助快速找到重要邮件 #生活知识# #生活经验# #软件#
文章目录 开启QQ邮箱的STMP服务导包MIMETextMIMEImageMIMEMultipartSTMP_SSL 设置收发邮箱账号创建SMTP_SSL实例邮箱内容纯文本HTML格式文本带附件附件中含图片 程序主入口 开启QQ邮箱的STMP服务
登录QQ邮箱->账号设置->开启服务->获取授权码
获取授权码的时候需要手机验证码

做完这步就可以进入正题了
导包为了方便, 我把授权码保存在了文件"./license.py"中
import smtplib import time from email.mime.image import MIMEImage from email.mime.text import MIMEText from email.mime.multipart import MIMEMultipart from license import pass_word 123456
以下是几个类的介绍
MIMETextdef __init__(self, _text, _subtype='plain', _charset=None, *, policy=None): 1
创建一个text / *类型的MIME文档。
_text是此消息对象的字符串。你要发的邮箱内容_subtype是MIME子内容类型,默认为“plain”。 可以理解为文本格式_charset是添加到Content-Type标头的字符集参数。默认为“ us-ascii”。请注意,作为关联作用,还将设置Content-Transfer-Encoding标头。意思是需要同时设置 MIMEImagedef __init__(self, _imagedata, _subtype=None, _encoder=encoders.encode_base64, *, policy=None, **_params): 12
创建一个iamge/ *类型的MIME文档。
_imagedata是包含原始图像数据的字符串。如果标准的Python`imghdr’模块可以解码该数据,则该子类型将自动包含在Content-Type标头中。否则,您可以通过_subtype参数指定特定的图像子类型。_encoder是将执行实际编码以传输图像数据的功能。它接受一个参数,即此Image实例。它应该使用get_payload()和set_payload()将有效负载更改为编码形式。它还应根据需要向邮件添加任何Content-Transfer-Encoding或其他标头。默认编码为Base64。任何其他关键字参数都将传递给基类构造函数,该构造函数会将它们转换为Content-Type标头上的参数。 MIMEMultipartdef __init__(self, _subtype='mixed', boundary=None, _subparts=None, *, policy=None, **_params): 123
创建multipart / *类型的消息。默认情况下,使用适当的Content-Type和MIME-Version头创建一个多部分/混合消息。
_subtype是多部分内容类型的子类型,默认为’mixed’。 boundary是多部分边界字符串。默认情况下,将根据需要进行计算。_subparts是有效负载的初始子部分序列。它必须是可迭代的对象,例如列表。您始终可以使用 attach() 方法将新的子部件附加到消息中。 Content-Type标头的其他参数来自关键字参数(或传递给_params参数)。 STMP_SSL这是从SMTP派生的子类,该子类通过SSL加密套接字连接(要使用此类,您需要使用SSL支持编译的套接字模块)。
如果未指定host,则使用”(本地主机)。如果省略端口,则使用标准的SMTP over SSL端口(465)。local_hostname和source_address具有与SMTP类中相同的含义。密钥文件和证书文件也是可选的-它们可以包含用于SSL连接的PEM格式的私钥和证书链文件。context也是可选的,可以包含SSLContext,并且是keyfile和certfile的替代方案;如果已指定,则密钥文件和证书文件都必须为“无”。def __init__(self, host='', port=0, local_hostname=None, keyfile=None, certfile=None, timeout=socket._GLOBAL_DEFAULT_TIMEOUT, source_address=None, context=None): 1234
了解完这几个类的功能和参数后,开始敲代码
设置收发邮箱账号sender = "*@qq.com" # sender email account receivers = ['*@qq.com'] # list or str of receiver's email 12' 创建SMTP_SSL实例
将message发送给指定账号
def try_send(message): """third party services""" try: # smtpObj = smtplib.SMTP() # smtpObj.connect('smtp.qq.com', 465) smtpObj = smtplib.SMTP_SSL(host='smtp.qq.com', port=465) smtpObj.login(user=sender, password=pass_word) smtpObj.sendmail(from_addr=sender, to_addrs=receivers, msg=message.as_string()) print("sent successfully") smtpObj.quit() except smtplib.SMTPException as e: print(f"failed: {e}") 123456789101112' 邮箱内容
主要有四个要素:
From:标识发件人To:标识收件人Subject:邮件的主题或者标题,一个好的标题可以让邮件的目的一目了然text content:邮件正文 纯文本发送一个无主题的纯文本邮件,QQ邮箱中查看运行结果,如图

def plain_text(): subject = "Python mail sending test" # Three parameters: text content, text format, encoding message = MIMEText(_text=subject, _subtype='plain', _charset='utf-8') message['From'] = 'husband' message['To'] = 'my lover' try_send(message) 12345678' HTML格式文本
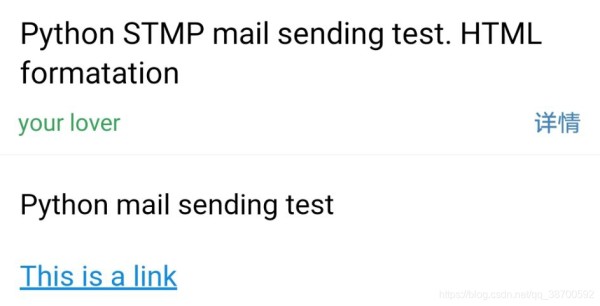
发送一个有主题的HTML格式文本邮件,运行结果如图

def html_format(): content = """ <p>Python mail sending test</p> <p><a href='http://www.baidu.com'>This is a link</a></p> """ message = MIMEText(content, 'html', 'utf-8') message['From'] = 'your lover' message['To'] = 'pink big' subject = 'Python STMP mail sending test. HTML formatation' message['Subject'] = subject try_send(message) 123456789101112' 带附件
邮件中携带附件,运行结果如图

def with_attachment(): message = MIMEMultipart() message['From'] = 'I miss you' message['To'] = 'people who miss day and night' subject = 'Python SMTP mail sending test' message['Subject'] = subject # message body content message.attach(MIMEText('want to see you now', 'plain', 'utf-8')) # Construct Attachment 1 and transfer the "quotes.csv" file in the current directory with open('quotes.csv', 'rb') as fp: att1 = MIMEText(fp.read(), 'base64', 'utf-8') att1["Content-Type"] = 'application/octet-stream' att1["Content-Disposition"] = 'attachment; filename="quotes.csv"' message.attach(payload=att1) try_send(message)
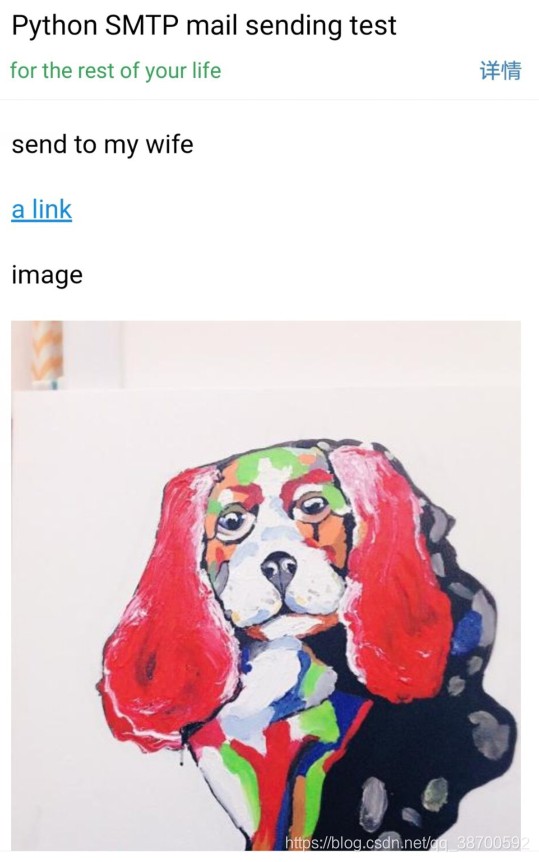
123456789101112131415161718' 附件中含图片邮件中携带图片,运行结果如图

def attach_image(): msgRoot = MIMEMultipart(_subtype='related') msgRoot['From'] = 'for the rest of your life' msgRoot['To'] = 'hai ping' subject = "Python SMTP mail sending test" msgRoot['Subject'] = subject msgRoot.attach(msgAlternative := MIMEMultipart('alternative')) mail_msg = """ <p>send to my wife</p> <p><a href='http://www.baidu.com'>a link</a></p> <p>image</p> <p><img src='cid:image1'></p> """ msgAlternative.attach(MIMEText(mail_msg, 'html', 'utf-8')) # specify picture with open(r'C:\Users\QQ\Downloads\308c43f46bd3b2bbcf46aa63f5dec1c2.jpg', 'rb') as fp: msgImage = MIMEImage(fp.read()) # Define the picture ID, quote in HTML text msgImage.add_header(_name='Content-ID', _value='<image1>') msgRoot.attach(msgImage) try_send(msgRoot)
1234567891011121314151617181920212223242526' 程序主入口if __name__ == '__main__': # date: 2020.05.04 # version: python 3.8.2, Pycharm 2020.1 plain_text() time.sleep(2) html_format() time.sleep(2) with_attachment() time.sleep(2) attach_image() 12345678910
注: 代码中用到了f-string和海象运算符, 由于不向后兼容, 旧版本中会报错
以上代码可实现QQ邮件的批量发送(其他邮件操作类似),一般正式的邮件只需要改动下称呼,然后直接套用模板。如何增强适用性?我们可以给收件人的称呼和账号之间建立一个映射(或者直接从保存好的文件中读取),对不同的人进行分类,对应于不同的邮件模板
网址:python 发送QQ邮箱 https://www.yuejiaxmz.com/news/view/408388
相关内容
用Python发送邮件,需要这样三步企业QQ邮箱:高效沟通,助力企业发展
misc»我们和腾讯有深度合作=公司用QQ邮箱
利用Python自动化日常任务
6个 Python 办公黑科技,工作效率提升100倍!(附代码)
Postfix 邮件发送功能配置
用python写一个股票提醒、并用邮件方式发送出去
如何使用Python实现日常任务的自动化
使用Python开发基于Python的虚拟助手
自动化运维?看看Python怎样完成自动任务调度⛵

